

Do It Yourself Manicure (At Home)
There is something about manicured nails. Those pretty nails make you look graceful and elegant, but the time and cost they require makes it difficult to maintain the perfect nails all the time.
But why wait to book an appointment at a salon and spend on something that you can do yourself at the comfort of your home. Even if you are not an avid DIYer you can totally rock those beautiful nails yourself because it’s so simple. You just need a few things and you are ready to give yourself the perfect manicure !!
You Will Need
Nail polish remover and cotton pads
Nail clipper and filer
Cuticle pusher and nipper
Cuticle remover or cuticle cream
Nail polish
sugar scrub to exfoliate
Your Step-By-Step Guide
1. Start With Clean Nails

Before you start your manicure, make sure your fingernails are free from any previously applied nail paint. Use an acetone-free remover to avoid any dryness and damage to the nails and to the skin surrounding them.
I love Colorbar Ultimate Nail Enamel Remover, it’s acetone free and comes in a handy bottle filled with foam which is soaked in Colorbar Ultimate Nail Enamel Remover. You don’t have to look for cotton pads, it’s hassle-free, just put your finger inside and twist to remove the polish in seconds.
2. Find The Best Nail Shape For You

With plenty of trendy nail shapes including stilettos, coffins, etc. there are actually no “wrong” nail shapes. But you need to identify the one for you depending on your requirement. According to the founder of Perfect Formula, Shari Gottesman- If you love long nails but hate the upkeep they require you should stick to oval shapes, as they are least likely to break or snag.
Oval is also a nail shape that is always trendy. On the other hand, shapes such as square, are more prone to breakage, especially when the nails are long. Go for square styles when you plan on keeping your nails short and neat. The square style is also great for dramatic lacquers. So, if you are trying a new bold nail colour keep your nails boxy.
If you want your manicure to last long oval is the perfect choice. It’s smooth and less likely to catch on things. If you go for box shape make sure that you round off the edges slightly to avoid ripping or snagging.
Also Read: How To Create Your Perfect Skincare Routine
3. Clip And File

So, now that you have chosen the right shape for your nails, it’s time for execution. Start filing your nails to get the desired shape. Clip your nails if necessary. While filing keep a few things in mind:
Always file in a single direction. Avoid dragging the file in to and fro motion.
If your nails are thin or peel easily, angle the file so that it lies slightly under the nail.
Avoid filing the nails too short.
Use a crystal nail file or emery board. Metal or extremely coarse nail files can cause splintering.
File from the outer edges toward the centre.
4. Buff The Edges

Once you have reached the final shape, it’s important to get rid of any rough or hanging edges. It's important to use a nail buffer after filing to get all remaining nail debris out from under the nail and from the sides of the nail along the cuticle line. This will also remove ugly yellow stains we all get from wearing too much dark polish!
I like the nail buffers from Revlon and Vega.
5. Soak Your Fingers

This is the most relaxing part of a manicure. Soaking the fingers will help soften the cuticles (the thin skin that adheres to the bottom of the nail plate). It also loosens up the dirt and dead skin cells. Soak your fingers or even hands in warm water and liquid soap or you could add vinegar to the warm water, then massage cuticle oil into cuticles. Soak your hand for max 2-3 minutes but avoid over soaking as it can damage the nails.
Use a nail brush to gently clean the nails and the skin around them to remove any traces of dirt. Don’t forget to scrape under the nails. Alternatively, you could exfoliate them too. You could go through my DIY body scrubs to choose anyone (preferably a sugar scrub). Rinse and pat dry.
Also Read: How To Buy Yourself The Perfect Sunscreen
6. Dealing With The Cuticles

Since you have already soaked your hands and applied cuticle oil, they must be soft by now. To further ensure that the cuticles are soft enough to remove them, you can use any of the following:
Rub a little Johnson’s Baby oil gel onto your cuticles.
Massage some cuticle cream.
Massage some cuticle oil.
Use a cuticle remover.
Now the cuticles are soft enough, start pushing them by using a orangewood stick or a cuticle pusher. (If you don’t have any of these just use the non-pointy end of a toothpick to push the cuticles). Do not exert too much pressure because that may push the cuticles too far in and damage your nails. This will also increase your chances of getting an infection.
Now trim the hangnails along the sides of the nails using a clipper or use a metal nipper to nip off the free edges.
7. Moisturise And Prepare For Polish
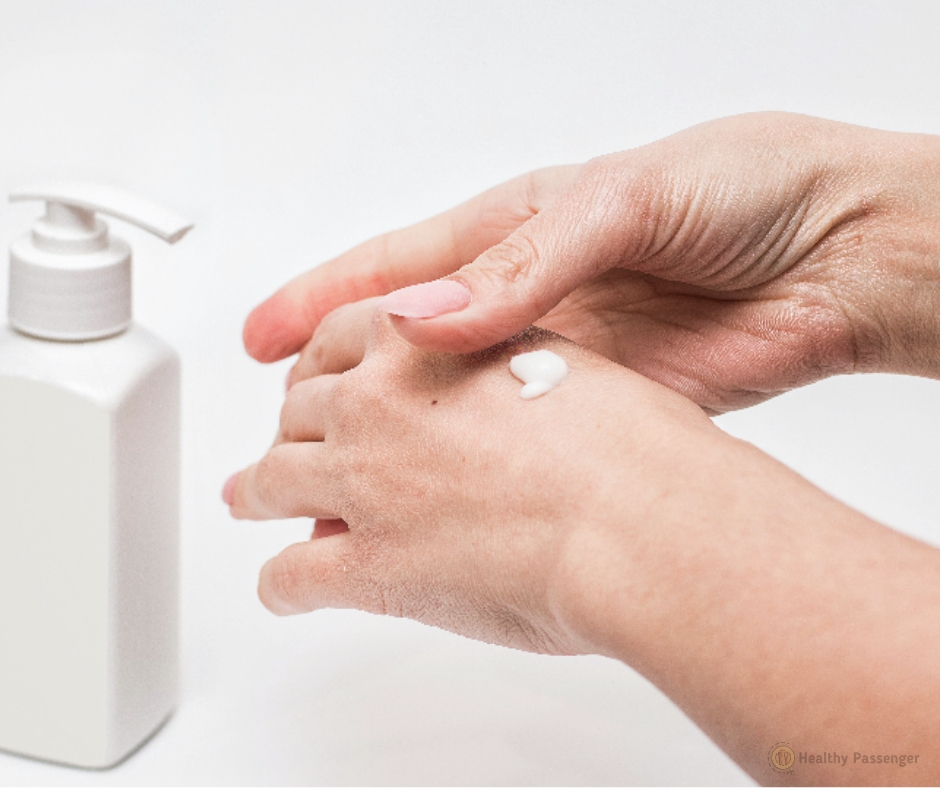
Apply a rich thick hand moisturiser into the cuticles and all over your hands to replenish the skin. Use an acetone-free nail polish remover to get rid of any oil on the nails. If the moisturiser is left on the nails, it will be difficult for the nail polish to adhere to the nails and may cause chipping an cracking of the polish earlier than expected. Avoid applying the remover in the cuticle area, it will strip away the moisturiser from that area.
8. Apply Base Coat
Base coat application is necessary to get a smooth surface before you apply the nail polish of your choice. Use a clear nail polish to form the base coat or you can even use a coloured nail paint as the base coat to make the colour of your nail polish more prominent. This also prevents your nails from getting stained (especially if you are wearing shades of red or black) and makes the polish last longer.
Also Read: How To Reuse Your Dried And Flaky Mascara
9. Apply The Nail Polish

Avoid shaking the polish bottle because that will create air bubbles in it and make it difficult for the polish to stick to your nails. Apply two thin layers of the polish instead of applying just one thick coat and let each layer dry before you apply the next one. The professional way of applying the nail paint is to swipe polish down the centre of the nail first, then on each side. Now wait till the paint dries, don’t use heat to dry it. Heat can cause chipping and cracking of the polish, however, you can use a fan.
If you smudged your nail polish, don’t worry just a dab a small amount of nail polish remover on your other finger and remove the smudged portion or you could also use some cotton dipped in remover and wrapped over a toothpick to target very small area.
10. Apply The Top Coat
After your nail paint has dried use a clear nail polish to give a top coat. Applying a top coat adds more shine and longevity to your manicure. It also smooths away any flaws. To make your manicure last even longer reapply the top coat every other day. This will also help maintain the new just out of nail salon look of your manicure.
Some Other Useful Nail Tips
If your normally white nails have been yellowed by nail polish, rub them with the peel of a lemon or grapefruit.
To maintain the health and moisture of your nails and hands, moisture your hands with a thick cream even after the manicure.
Avoid cutting your nails if they are already short. Just file them.
Just push your cuticles back. Never cut them, this increases chances of infection.
To maintain strength and flexibility of your nails, stay polish-free for at least one week per month and brush on any nourishing oil such as jojoba oil.
Ensure your nail polish is free from formaldehyde, toluene, or dibutyl phthalate (DBP). Formaldehyde is a known carcinogen, while DBP and toluene are potential reproductive toxins.
Between manicures, store your polish in the refrigerator and bring it back to room temp before painting it on.
Use ice water to dry your nails in three minutes.
Fix a broken nail using nail glue.
Soak your nails in a solution of hot water, hydrogen peroxide, and baking soda for about a minute. Or use a whitening toothpaste on a toothbrush and scrub the stains off your nail. This will whiten your nails after removing a dark nail polish.
The first coat of chunky glitter polishes should be dabbed on and not brushed on. This will help to distribute the glitter evenly.
If you accidentally smudge a nail while it's still wet, you can easily fix it by licking your finger and gently smoothing the smudge out. Sounds disgusting but works well.
Use VapoRub for nail infections. The thymol in Vaporub helps cure nail infections.
Get A Manicure Kit
Vega Manicure Set With 5 Tools

The set includes:
Small nail file
Small nail clipper
Tweezer (square tip)
Cuticle trimmer with pusher
Black head remover
Price : Rs.275
Browse through the beauty section to go through my simple beauty tips and tricks or follow me on Instagram to get your daily dose of beauty.
Have a suggestion? Please leave a comment.

